Hello there! So I don’t think I’ve ever really posted any specific LOTD or Eye makeup tutorial type thing on my blog. Don’t get me wrong, I do have quite a lot of eye/fotd type pictures in iPhoto, but a lot of them get rejected because of one of all of these reasons:
- Blurry, unfocused – I like the eye looks to be sharp and crisp!
- Wrong lighting which cannot even be corrected by Photoshop
- Great photo but I cannot remember the products used or how I did the look (happens all the time)
You might ask, why not snap the pics on weekends? Well, it’s because I rarely wear any makeup on weekends unless I’m filming. Weekends are very chill and yoga-focused for me.
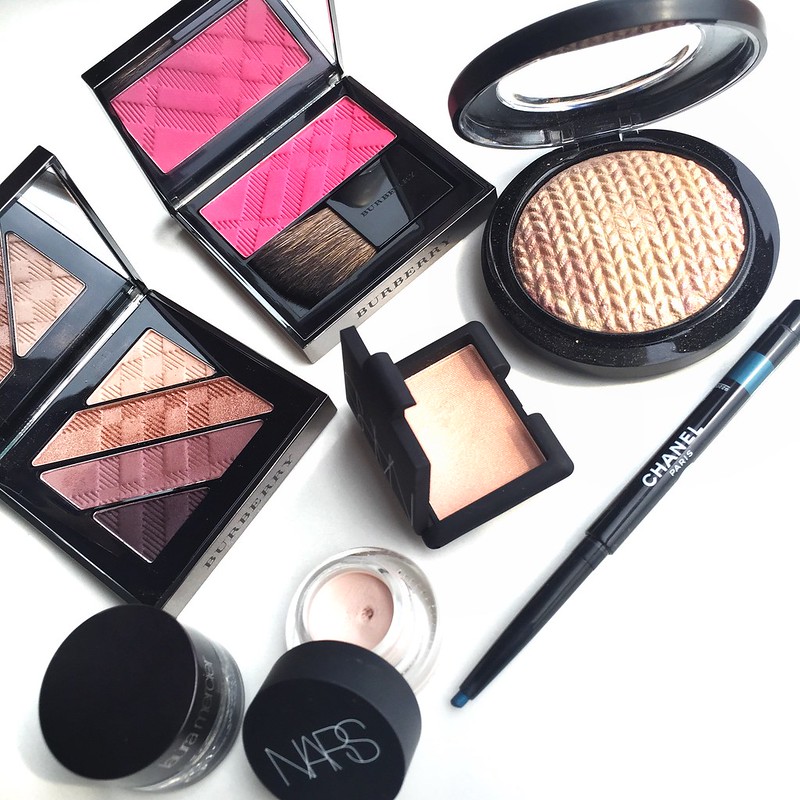
Since I had to attend an event yesterday, I took advantage of the daylight and time I had to snap some pictures of the look I came up with. Very often, I just “wing” my look as I go along, without too much prep on the products I would use or how I would place the colours. Yesterday was no different, except that I wanted to use products that I haven’t used in a while, most of which are brand new, just lying around waiting to be picked.
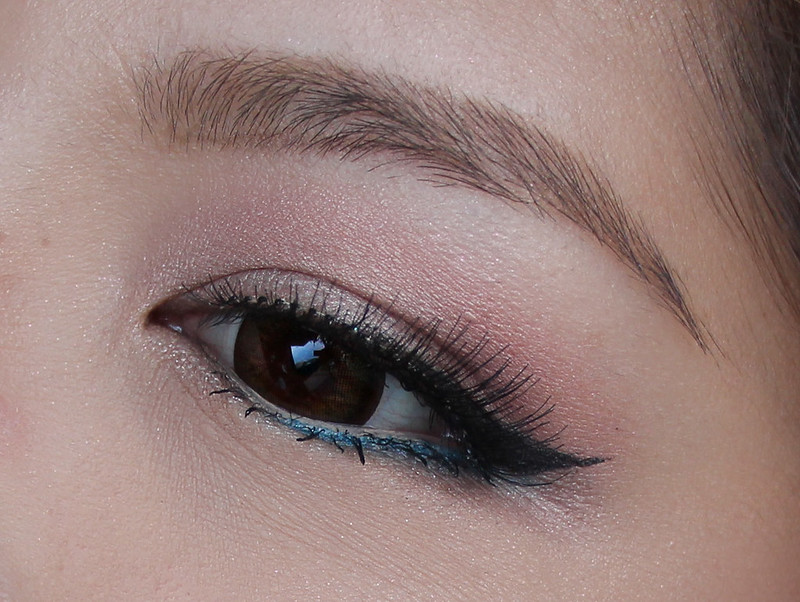
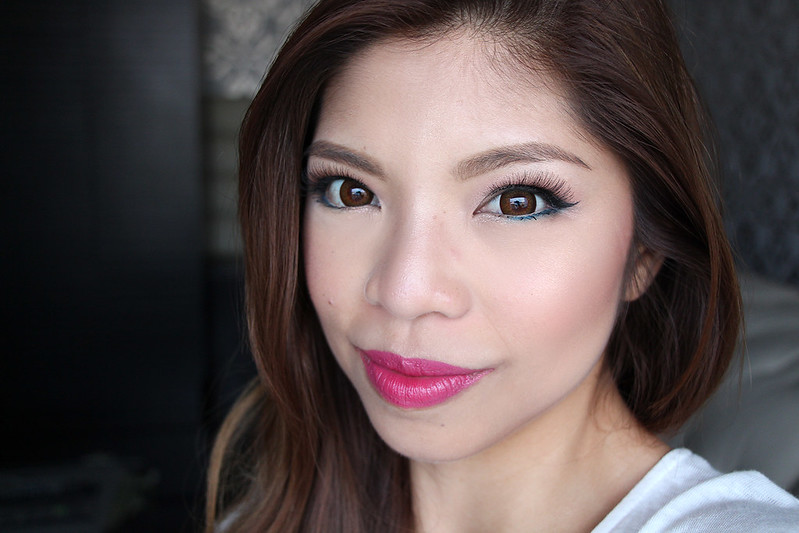
So, the above is the complete look I created, what started out as a “neutral” look turned out to be quite colourful. Haha. I couldn’t do away with my bright lips.
Alright let’s get into the look.
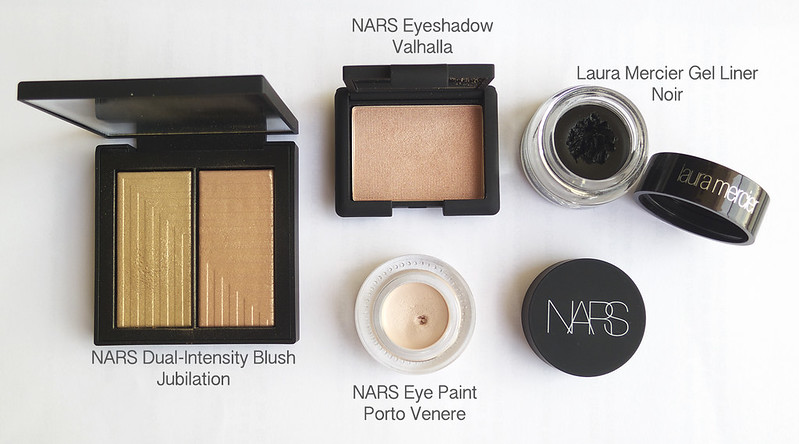
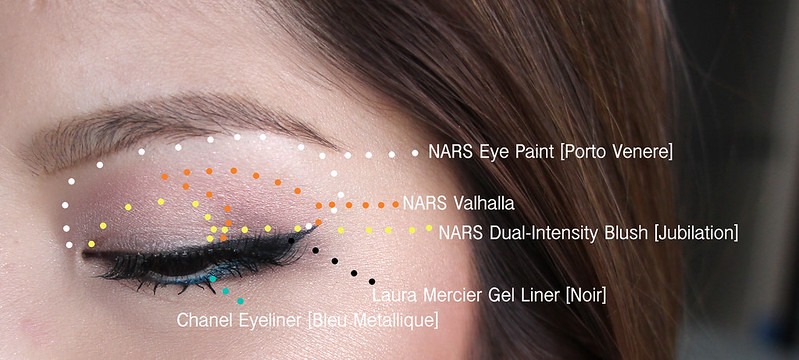
- I first applied the NARS Eye Paint in Porto Venere as a base all over my eyelids, taking it up to right under my eyebrows. I believe the Eye Paint has multiple uses, you can use it as a liner, highlighter, to shade and define. I tried using it as an eyeshadow base and it does work quite well. No creasing at all.
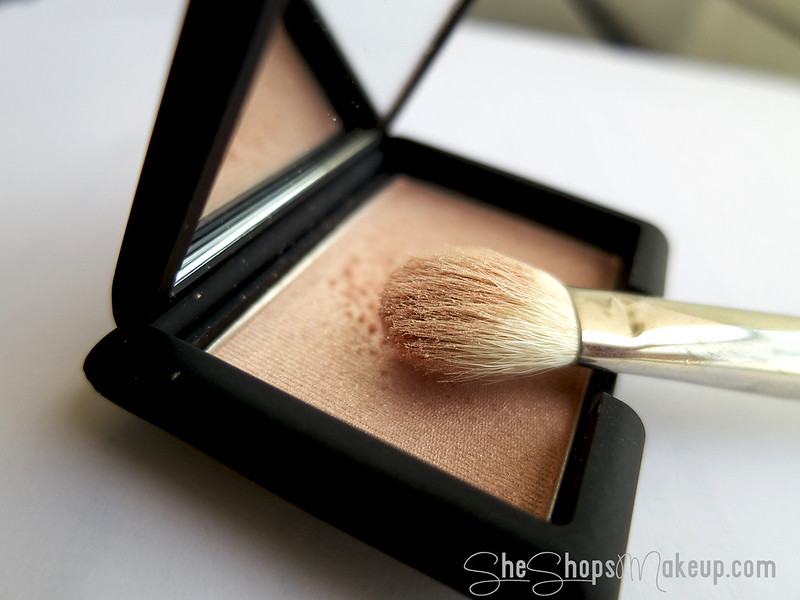
- Next, I took some NARS eyeshadow in Valhalla – a shimmering peach shade, onto my crease, blending it slightly above the crease. Even though it’s quite shimmery in the pan, the shimmer was not over-powering when applied and blended. I blended it out with MAC 217 brush.
- Because I wanted my eyeliners to be the star of the look, I wanted to keep the inner corner and centre of the eyelids clean but bright. So I chose to use the golden shade from the new NARS Dual-Intensity Blush in Jubilation. I dabbed the colour on with my finger rather than a brush.
- Forgot to include in my product shot above, I also blended a little of the taupe shade from Burberry Nude Blush Eye Palette onto the outer corner of my crease to add some depth to my eyes.
- At this point, you want to use a fluffy blending brush and windshield wiper motion to blend the 2 colours together.
- It’s been a long while since I last used a gel liner, so I decided to pull out my Laura Mercier Gel Liner in Noir and drew quite a dramatic wing with my Hakuhodo eyeliner brush.
- Another eyeliner that I have been meaning to use was my Chanel eyeliner in Bleu Metallique. I applied it onto the outer half of the lower lash line – note: not waterline, but along the lash line. I was careful to apply it from the outer corners to the centre of the eye, this way there’s less colour on the middle part of the eyes.
- I then blended out that liner with a pencil brush to soften the liner.
- Finished off the look with mascara and a pair of Eyllure lashes I got from the UK.
These days, I also try to use as few brushes as possible on all my eye looks because brush washing is not top of my list of activities on weekends.
Rest of the makeup used on the face:
- YSL Youth Liberator Serum Foundation
- NARS Creamy Concealer in Medium 1
- Tarte Loose Setting Powder
- Urban Decay Naked Skin Ultra Definition Loose Finishing Powder
- Giorgio Armani Eye and Brow Maestro for the brows
- Guerlain Terracotta 4 Seasons Bronzer
- Kevyn Aucoin Sculpting Powder
- MAC Mineralized Skinfinish in Perfect Topping
- Burberry blush in Hydrangea Pink
- Shu Uemura Laque Supreme in WN02
I think that’s all I used. Hope this has been fun and helpful for you. Thanks for reading!
